Customize Your Organization and Invite Other Members Of Your Organization
Welcome! This step-by-step tutorial is specifically designed to assist you in swiftly onboarding your organization onto the Flex platform. Let's get started!
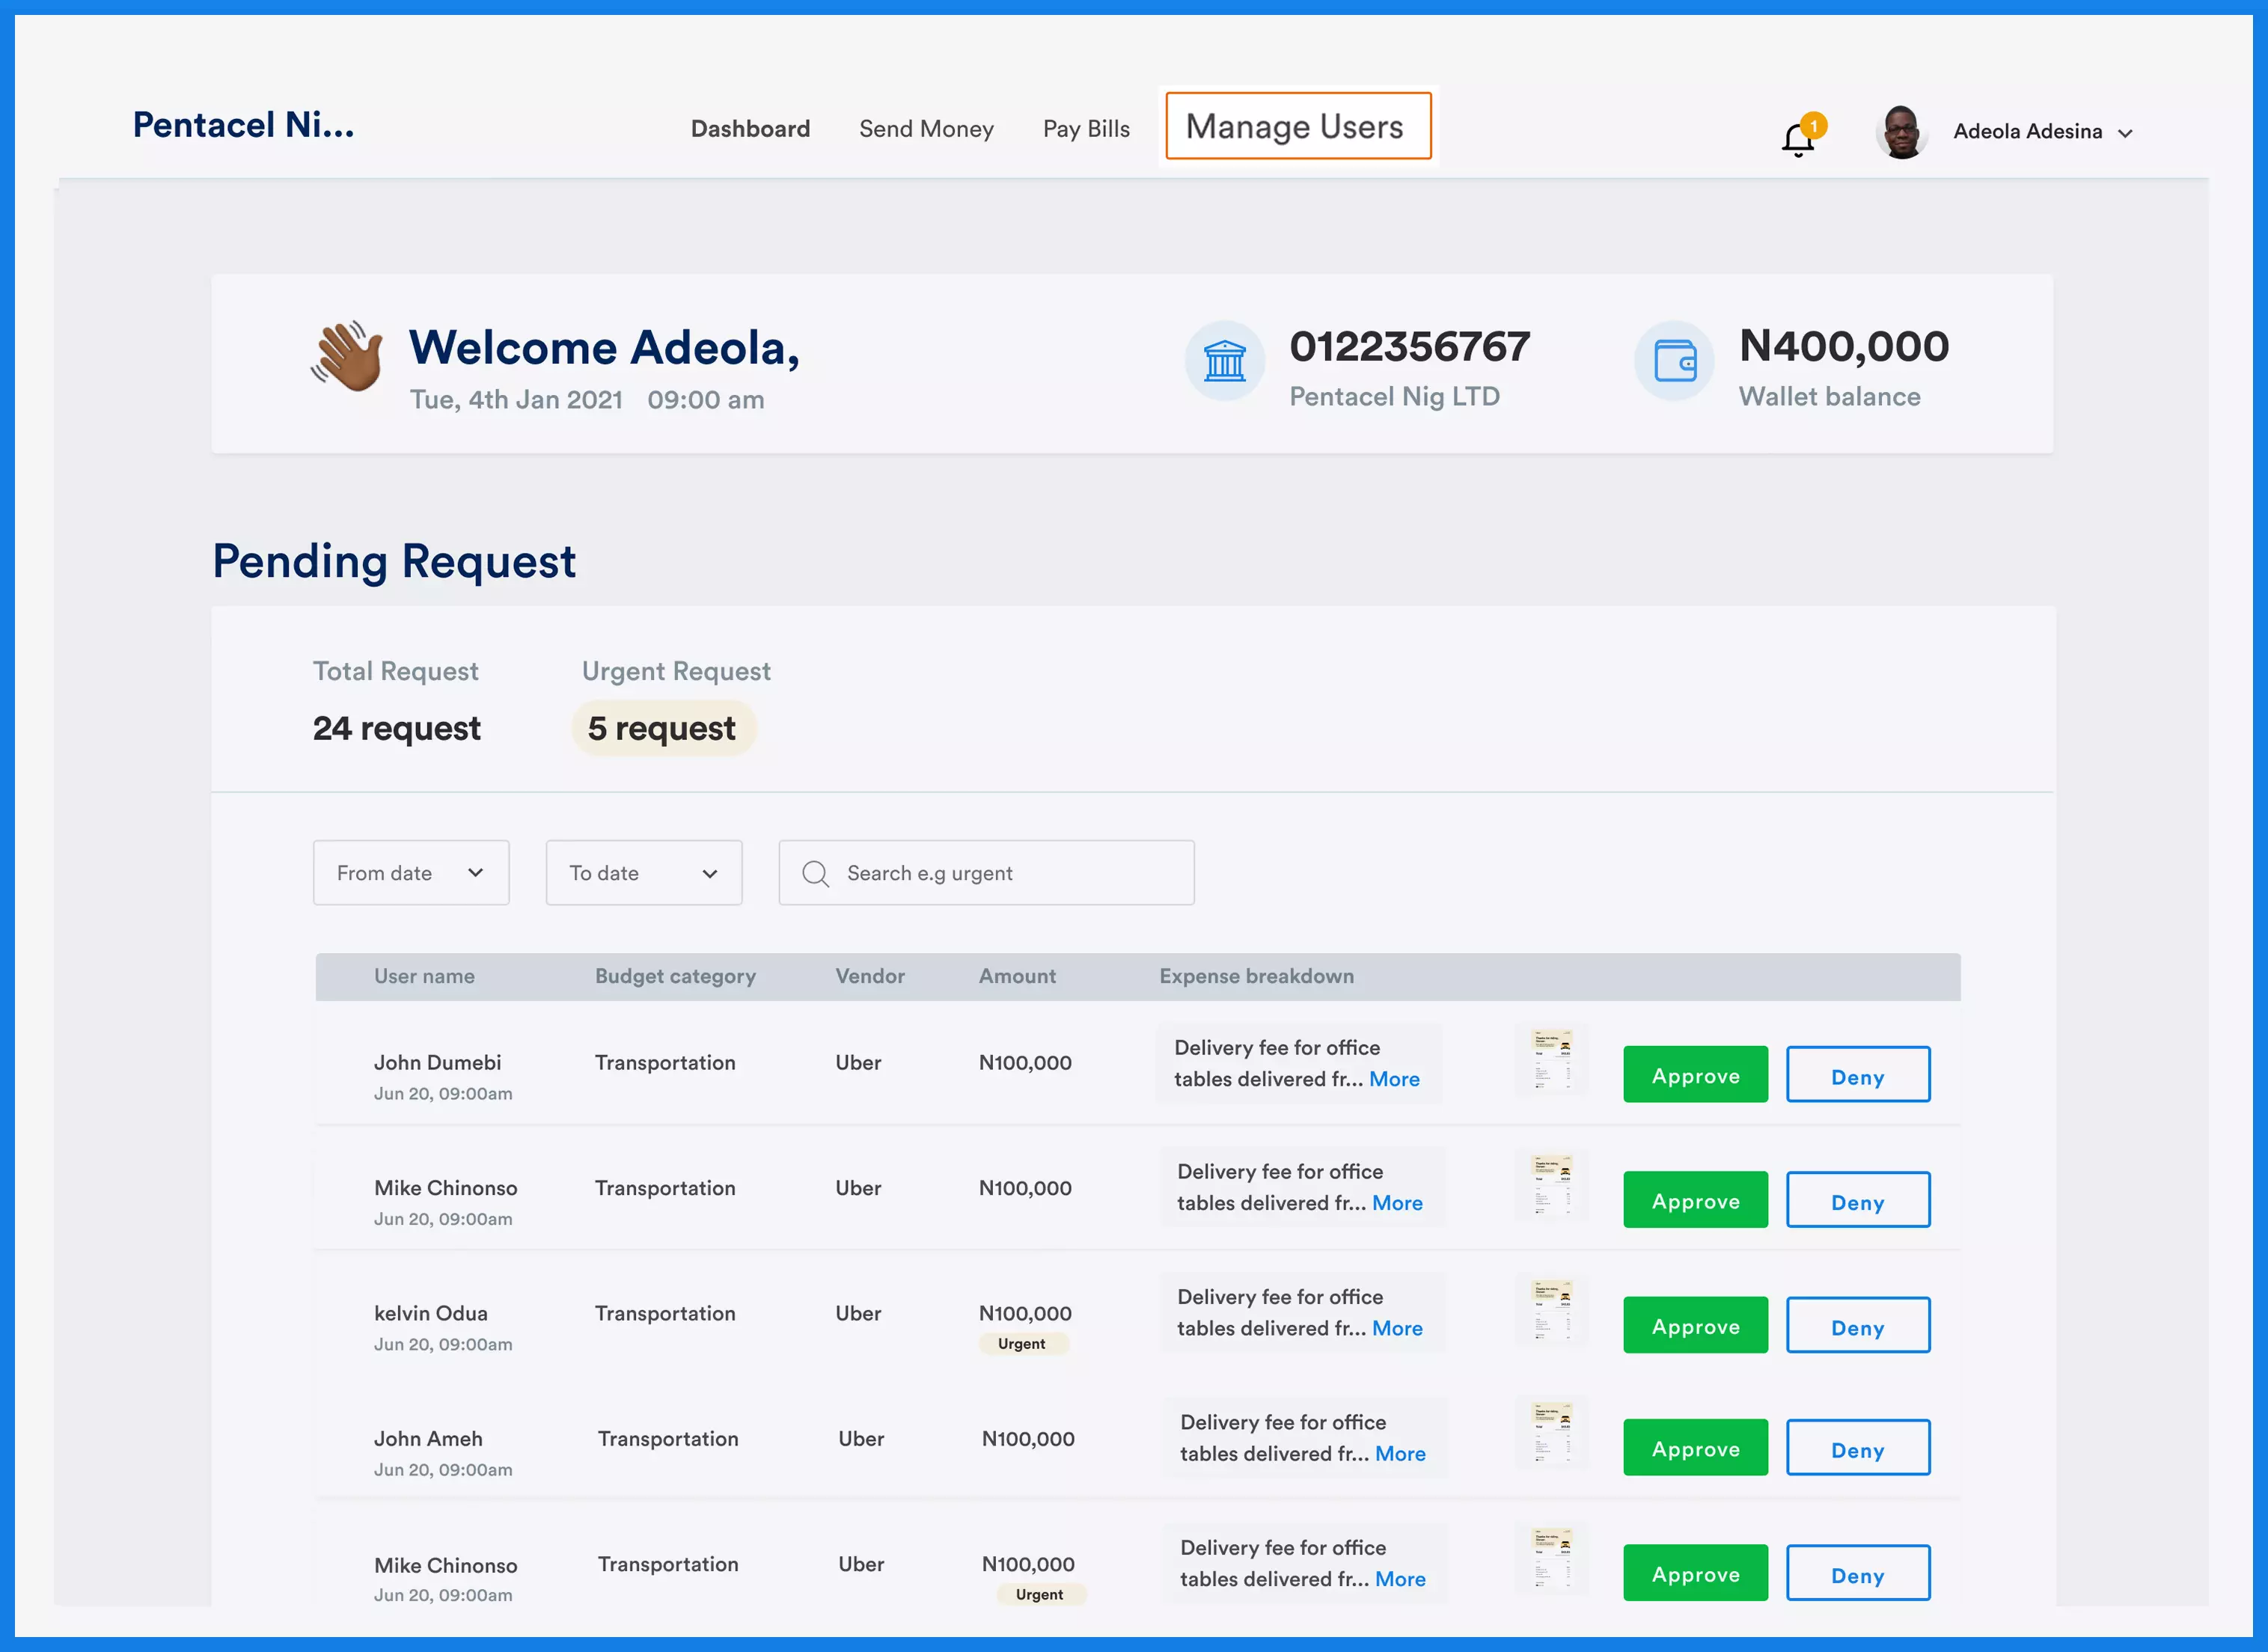
Step 1: As an admin or a user with admin permissions, login into your Flex dashboard.
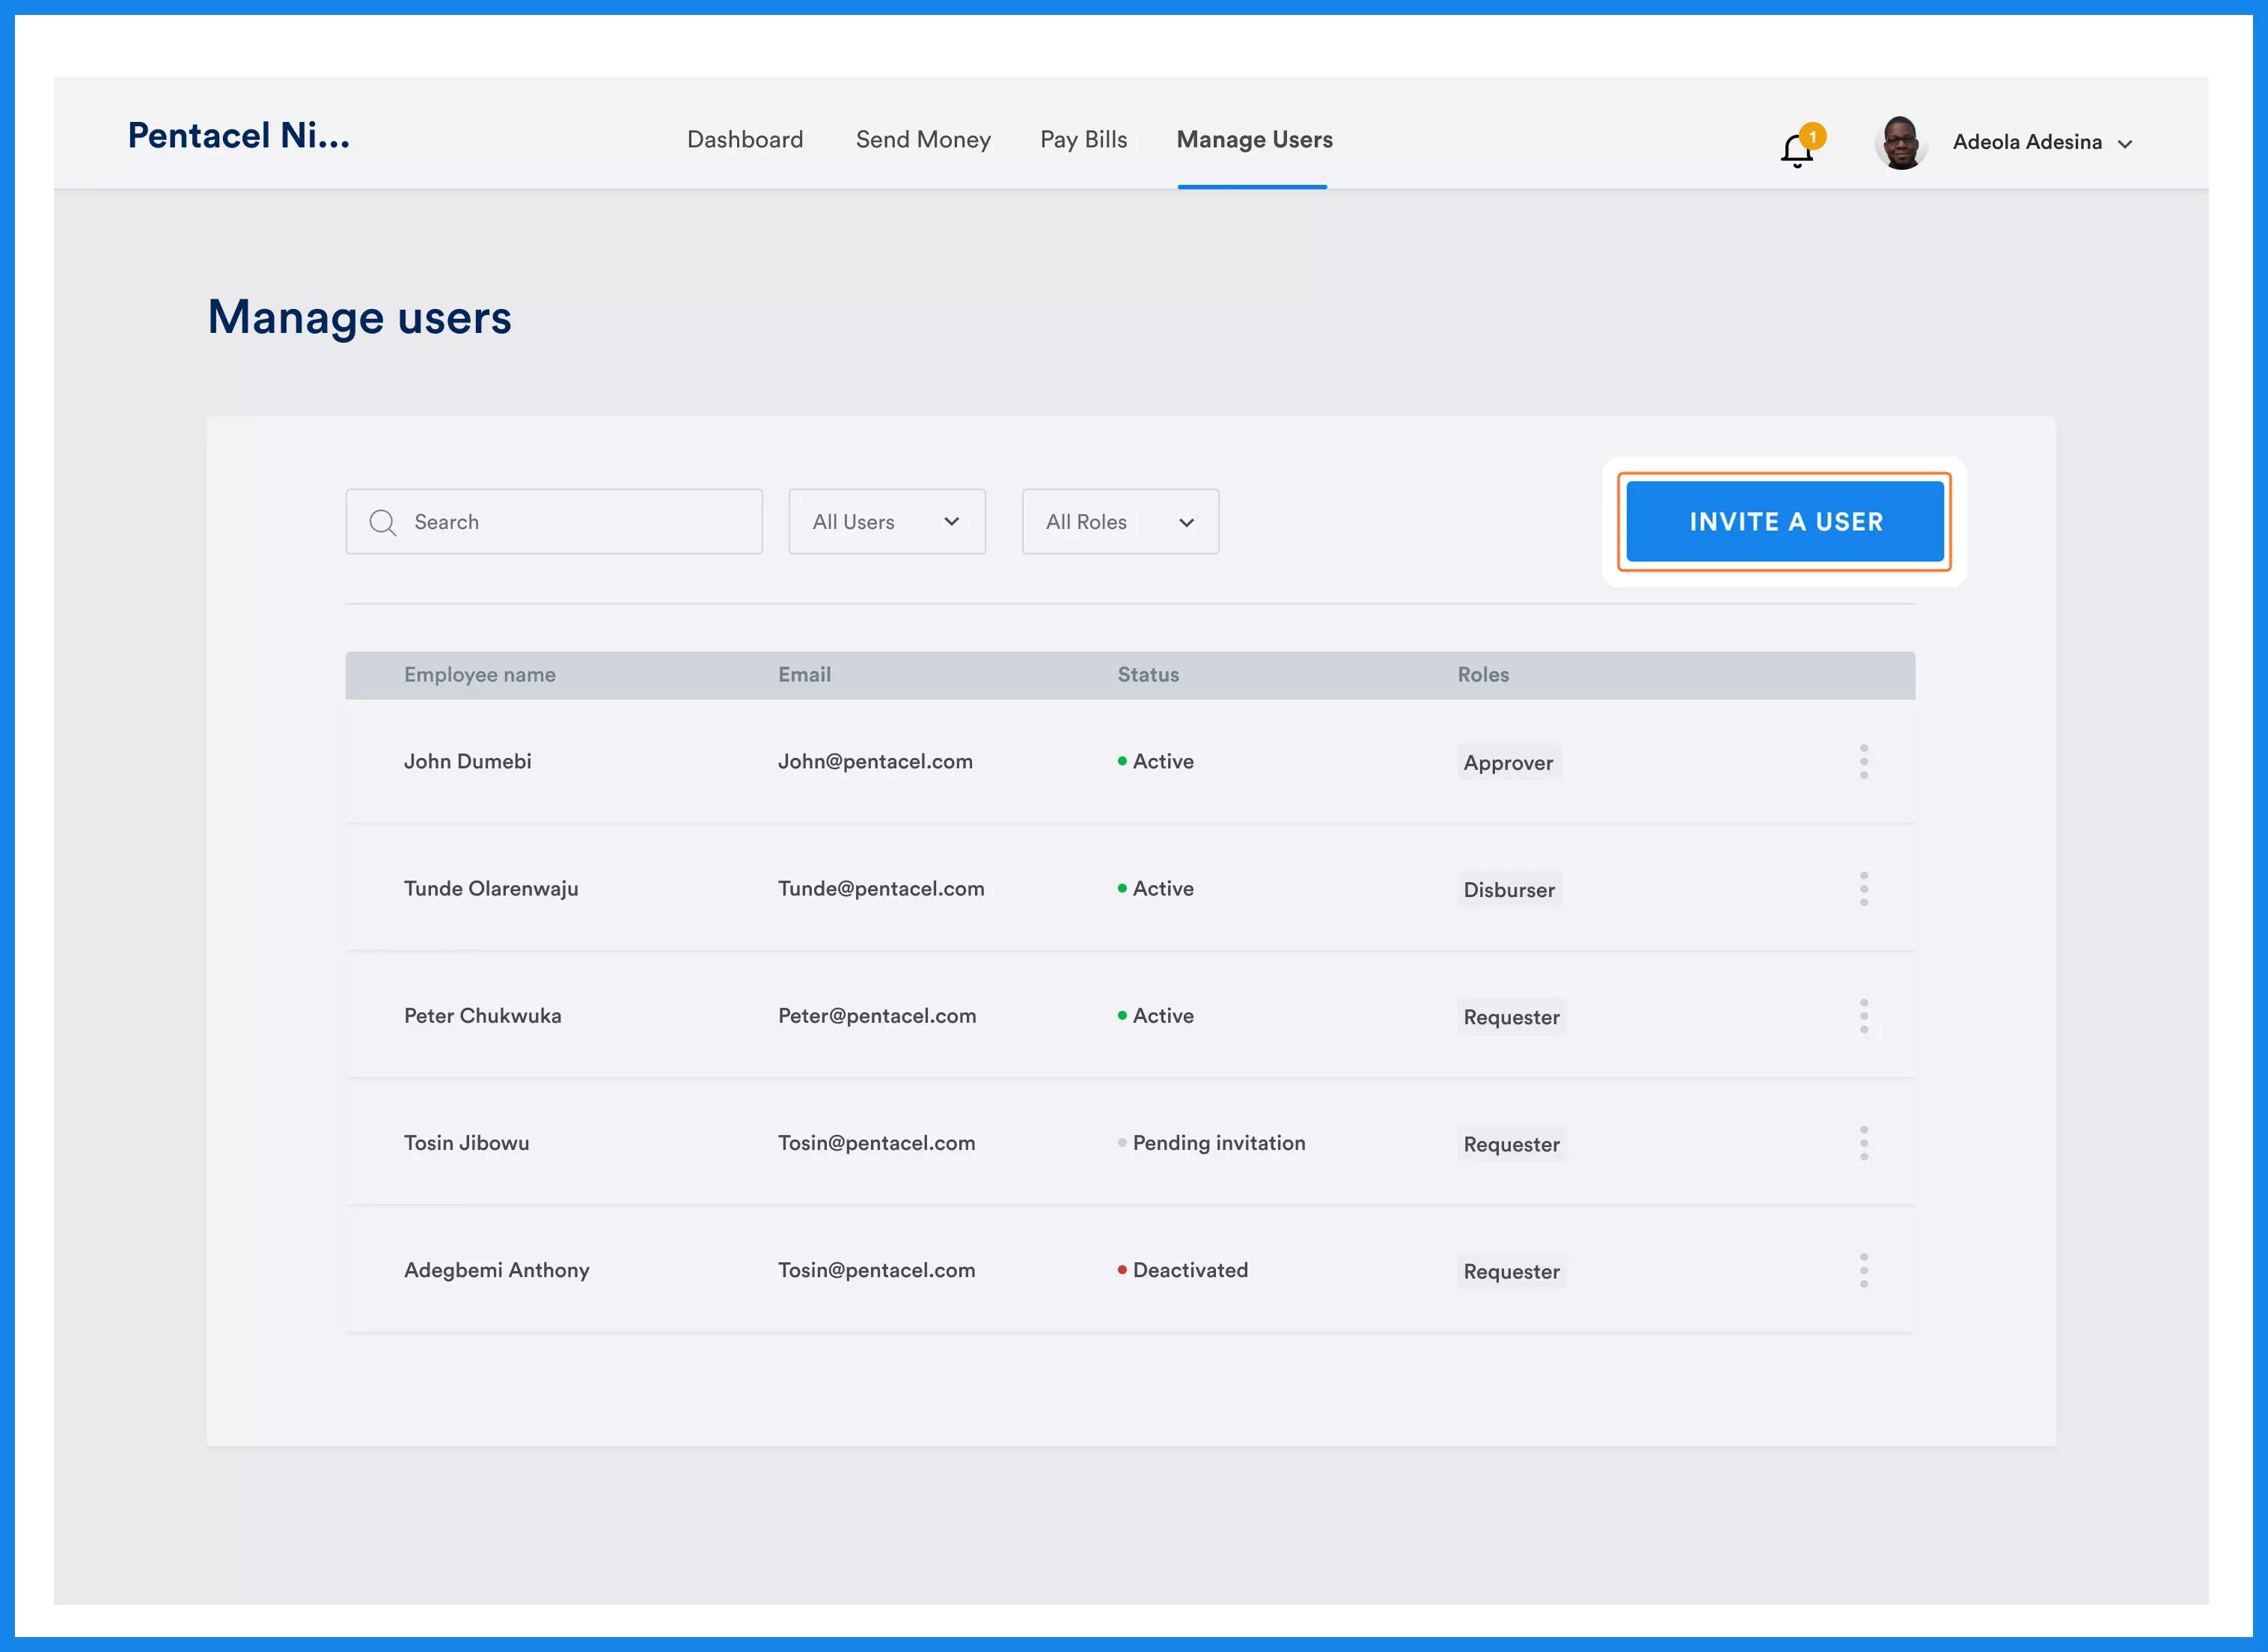
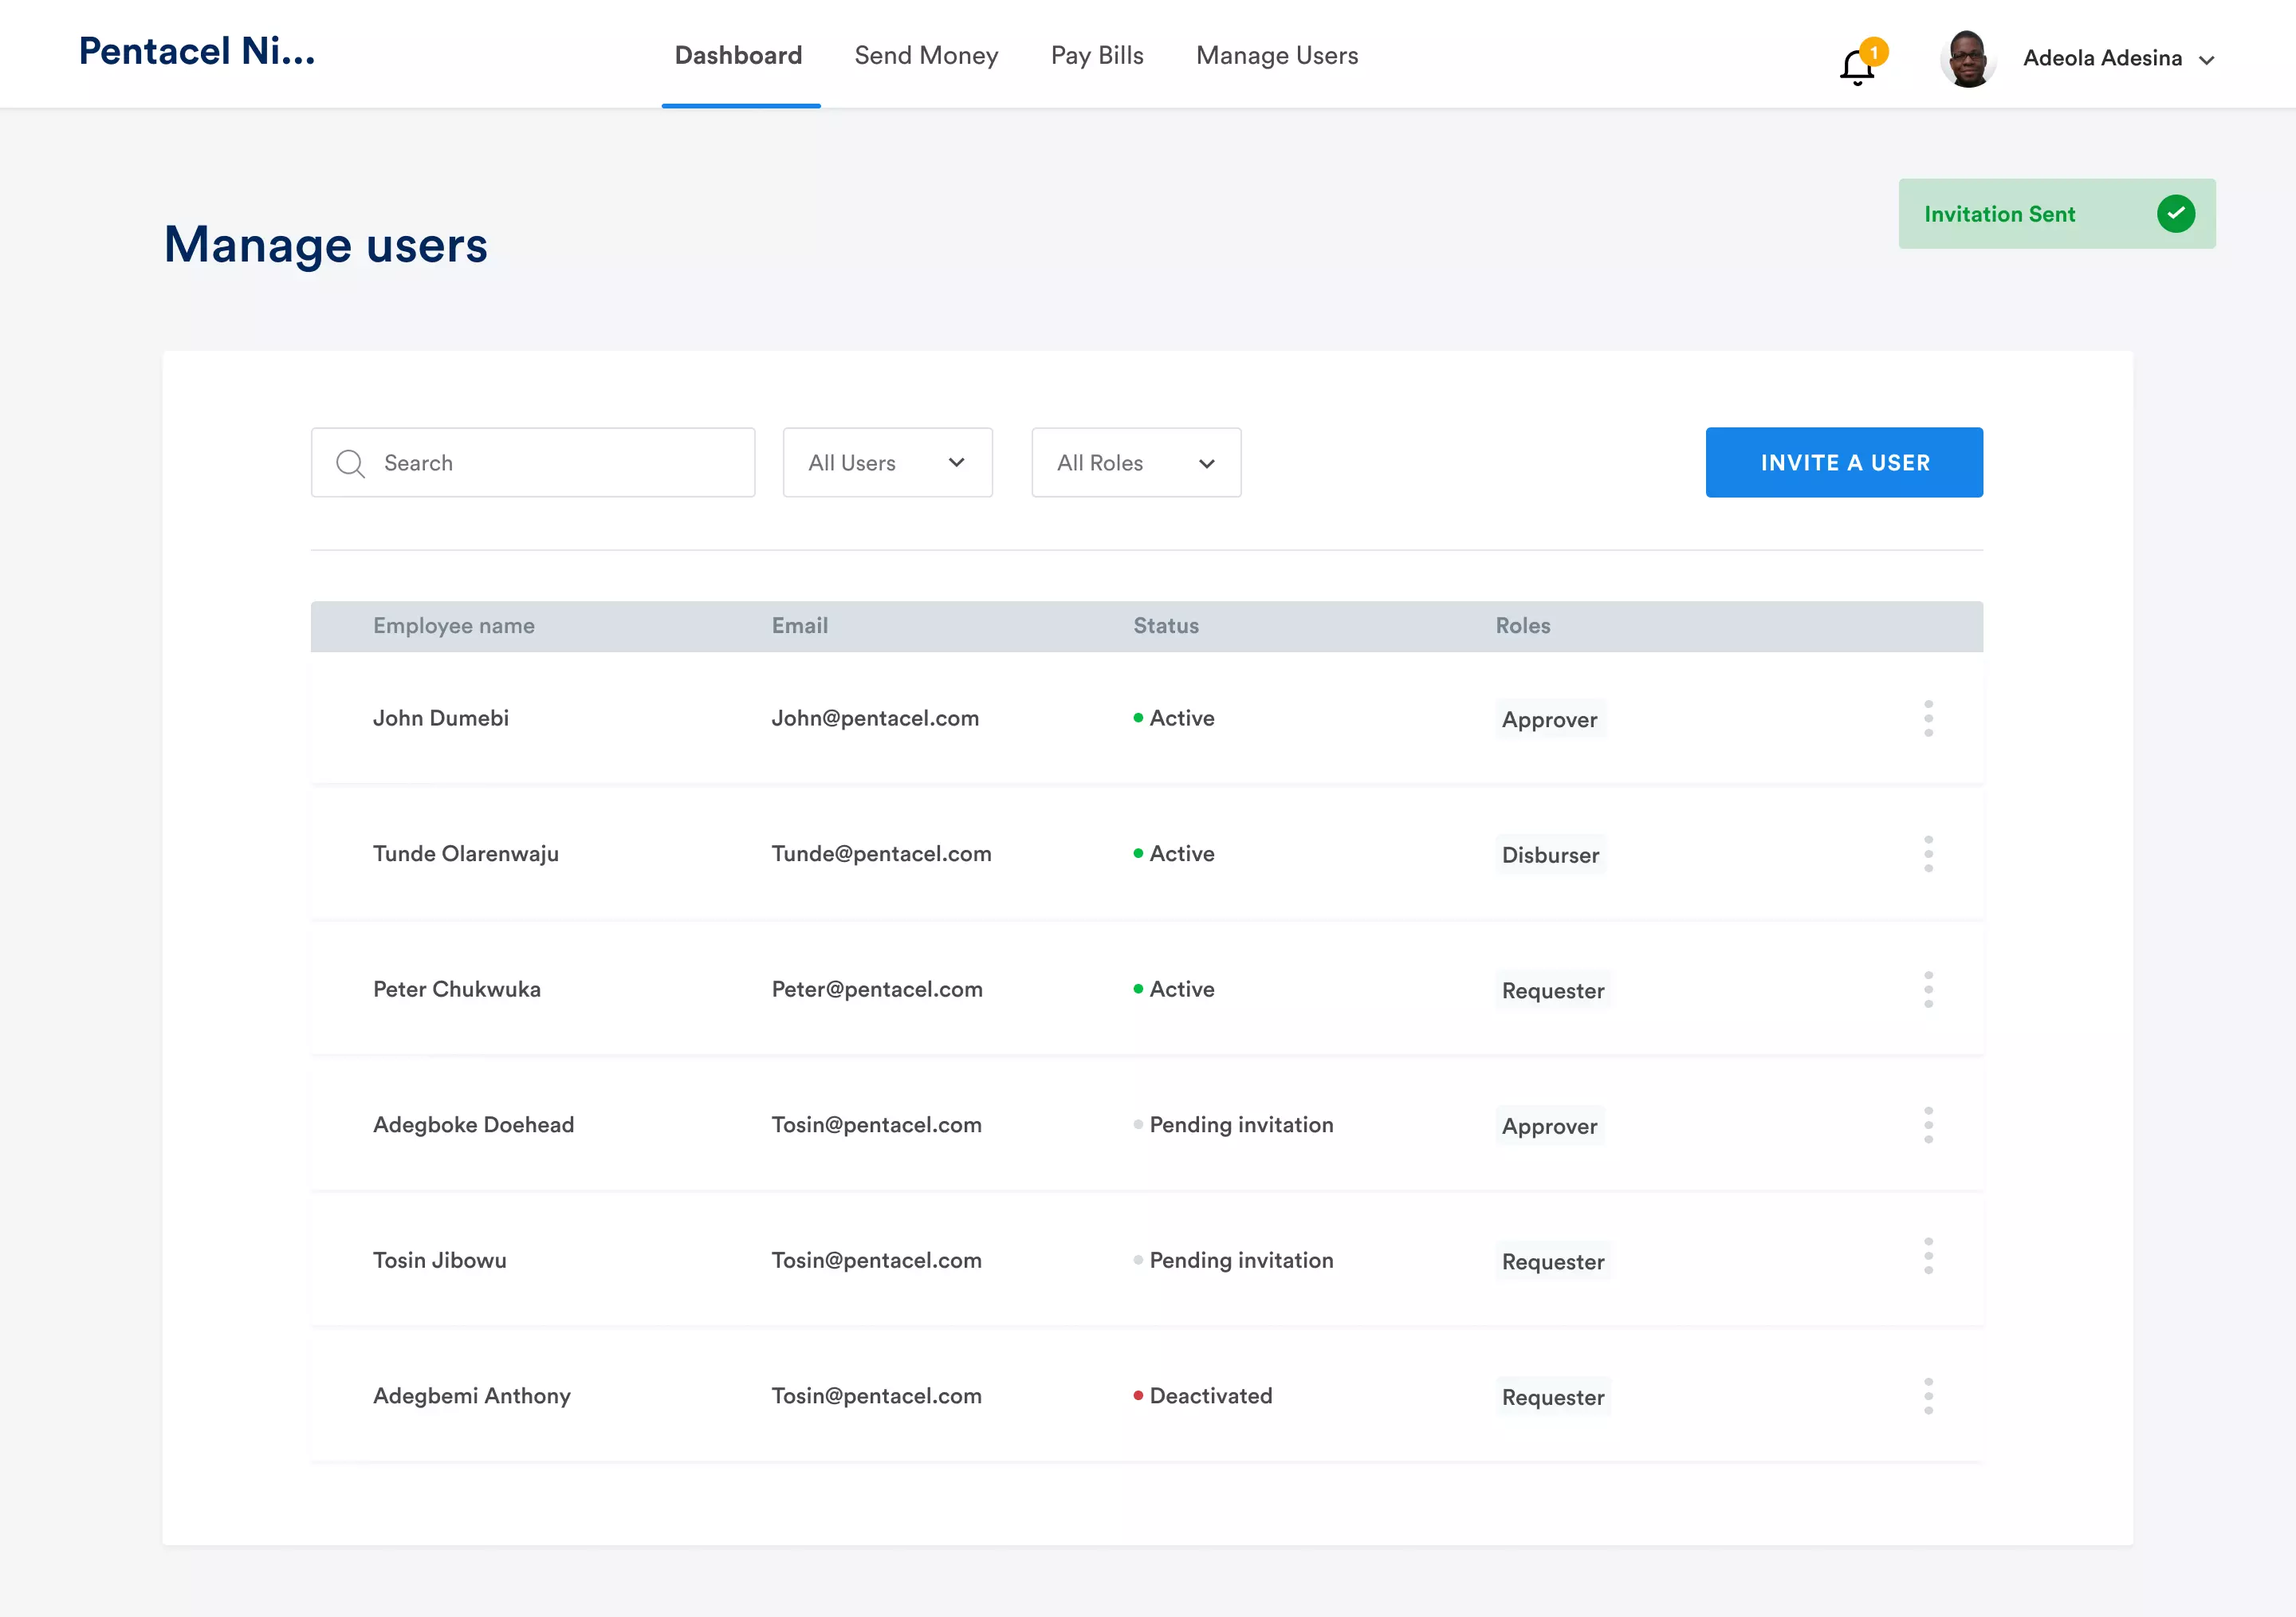
Step 2: Locate the "Manage Users" option in the navigation bar and click on it.
Step 3:On the user management page, click the "Invite User" blue button to begin the invitation process.
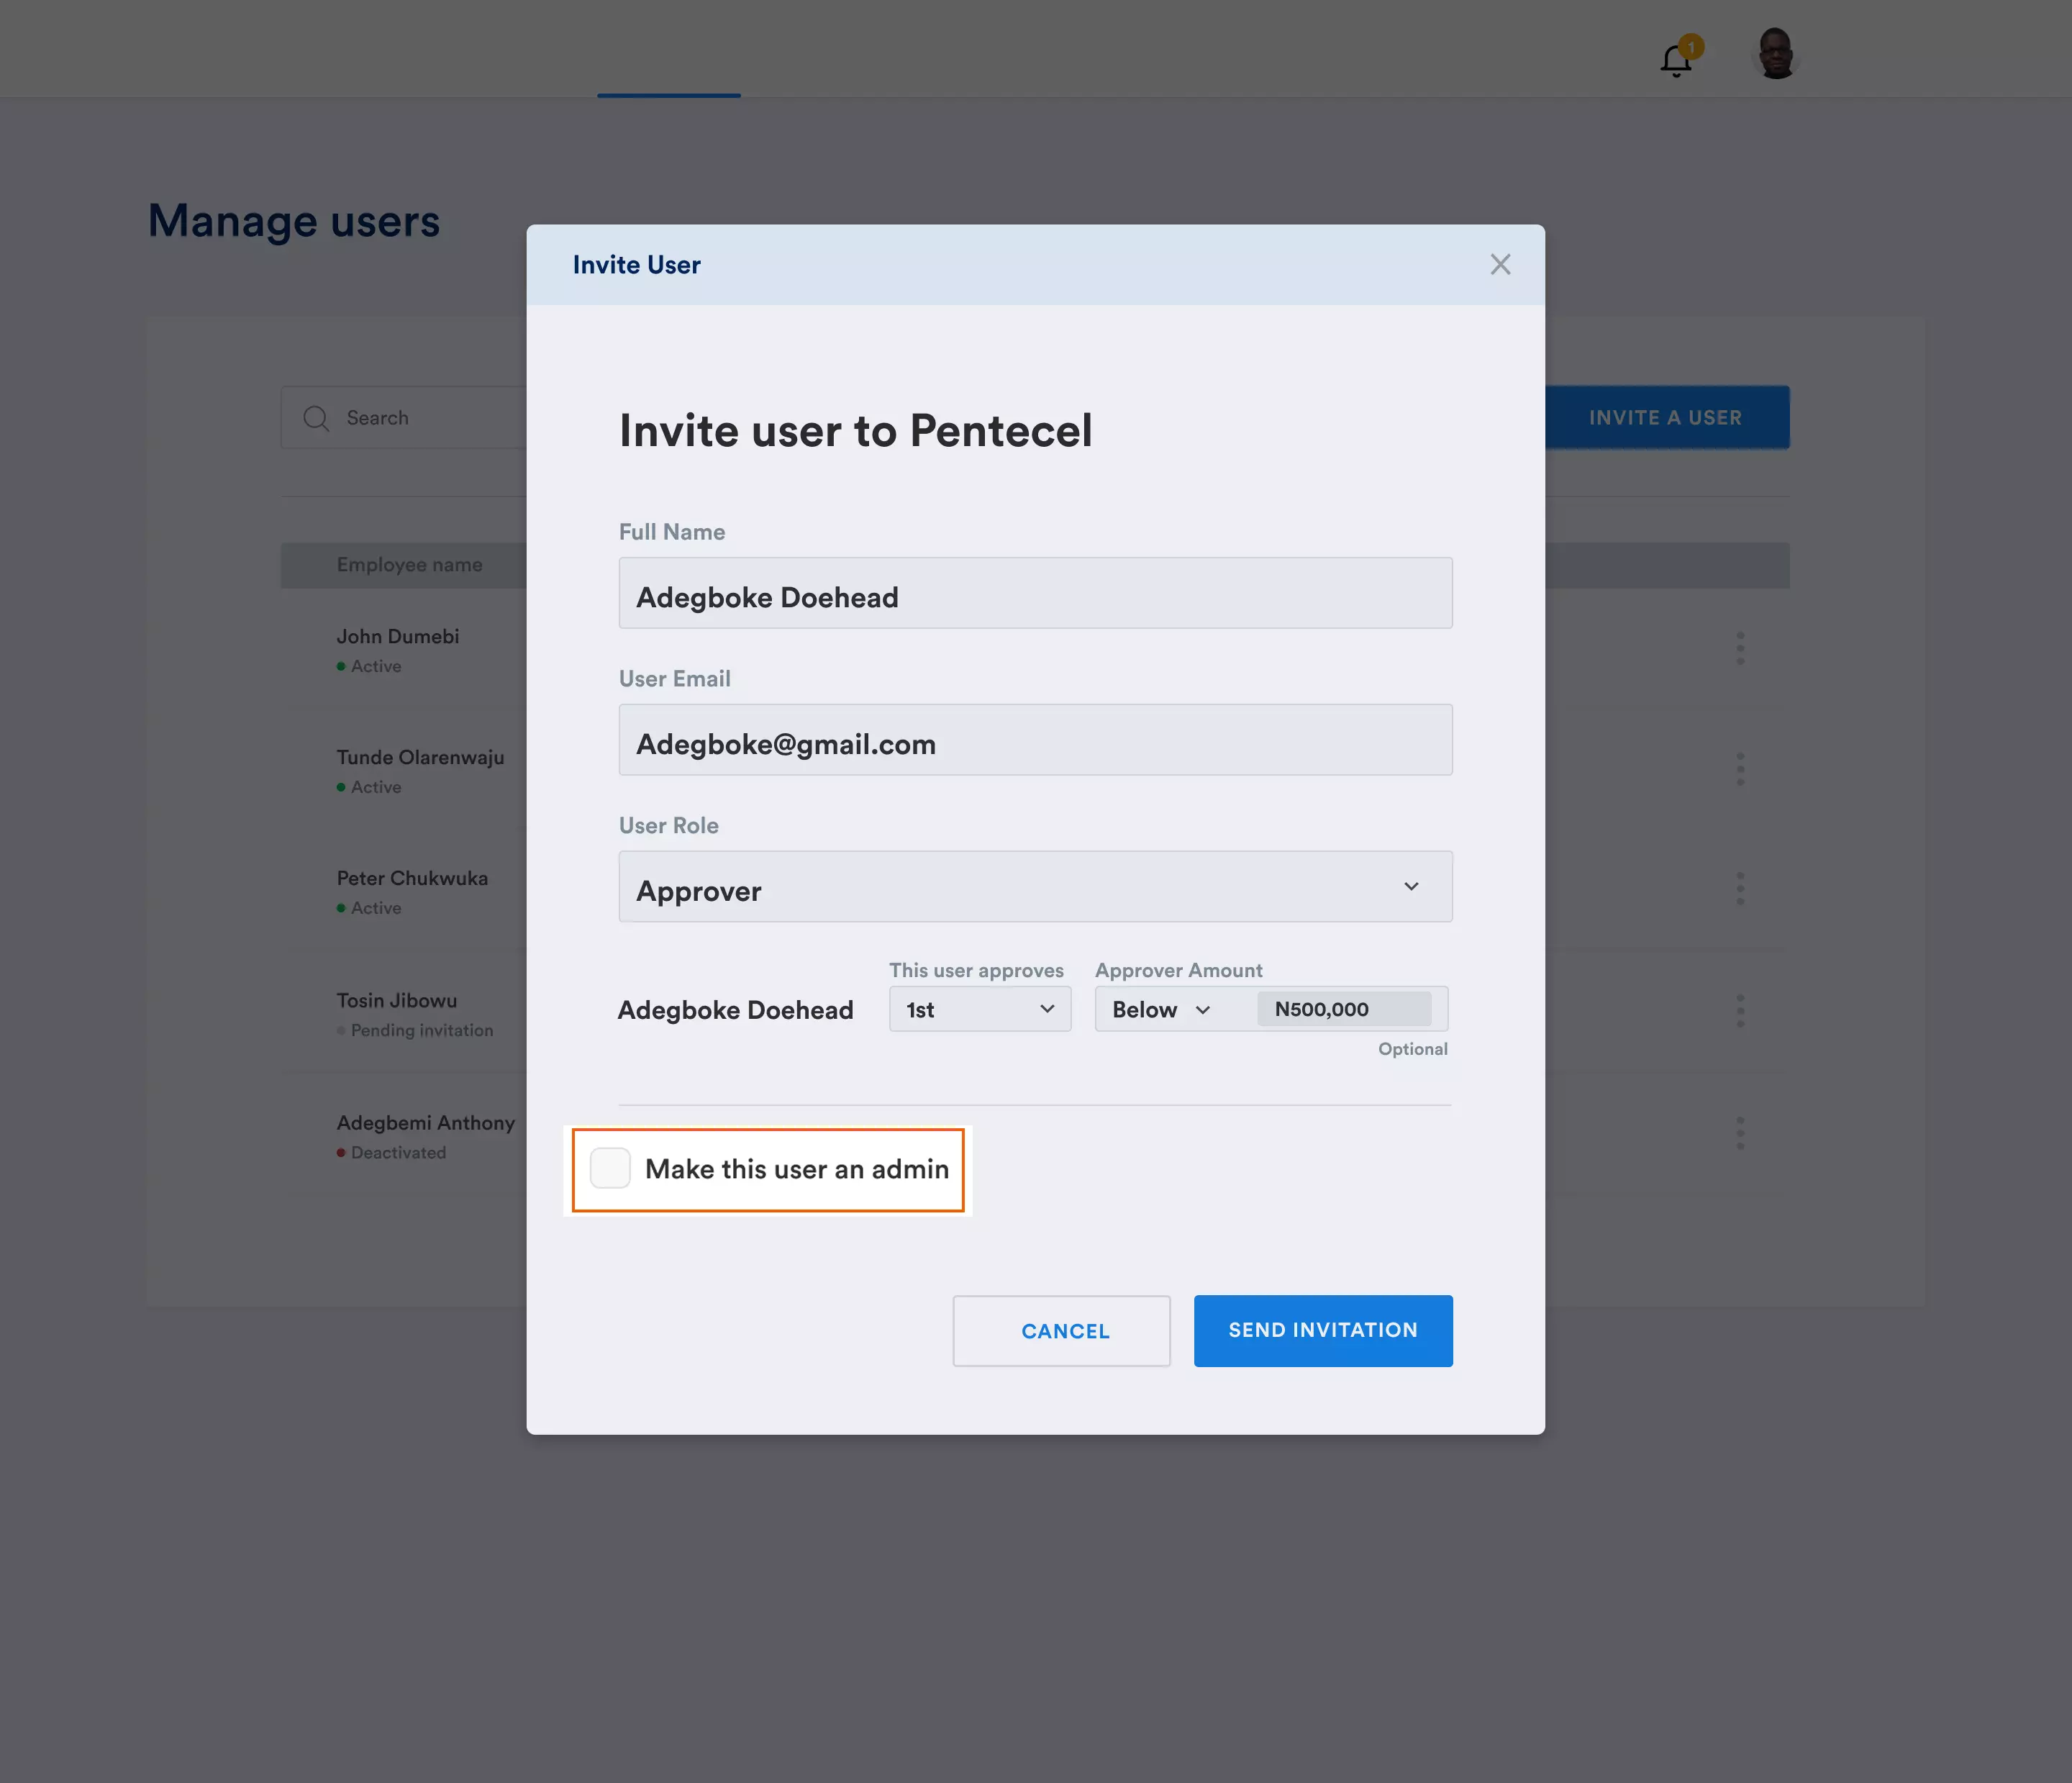
Step 4: Fill in the required details, including the employee's full name and email address.
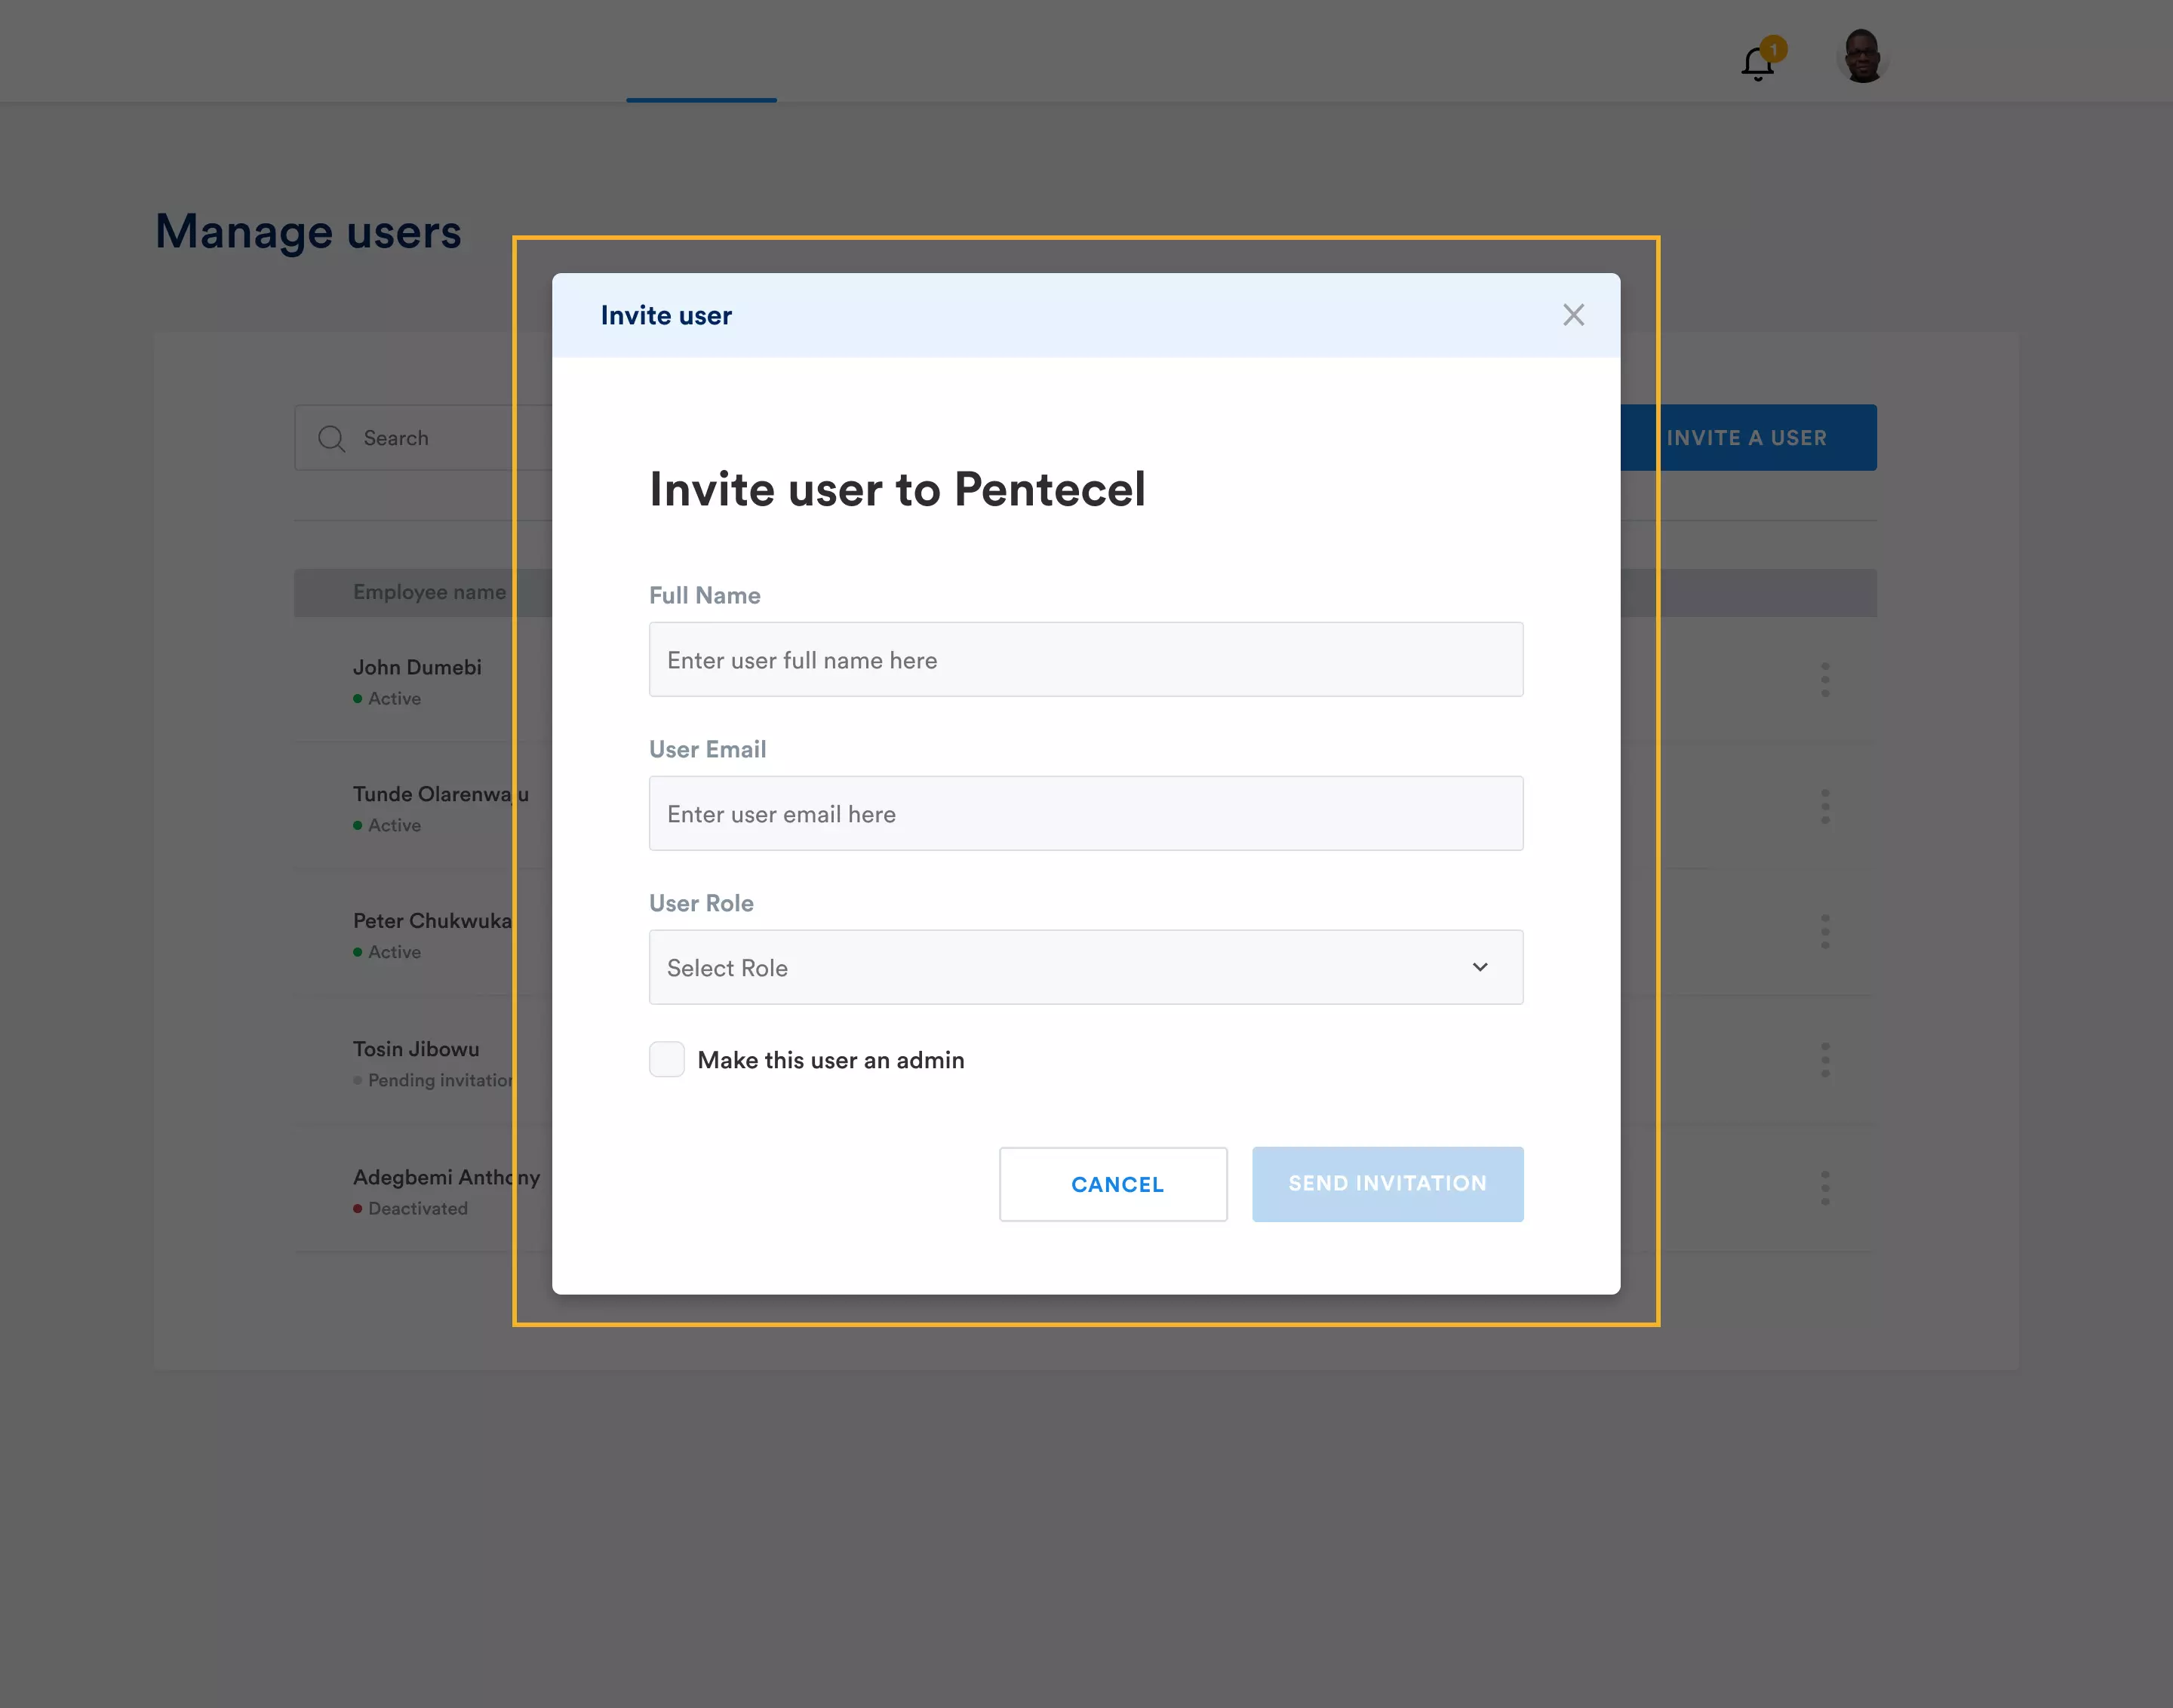
Step 5:Select the appropriate role for the user: Approver, Disburser, or Requester, based on their responsibilities within the organization.
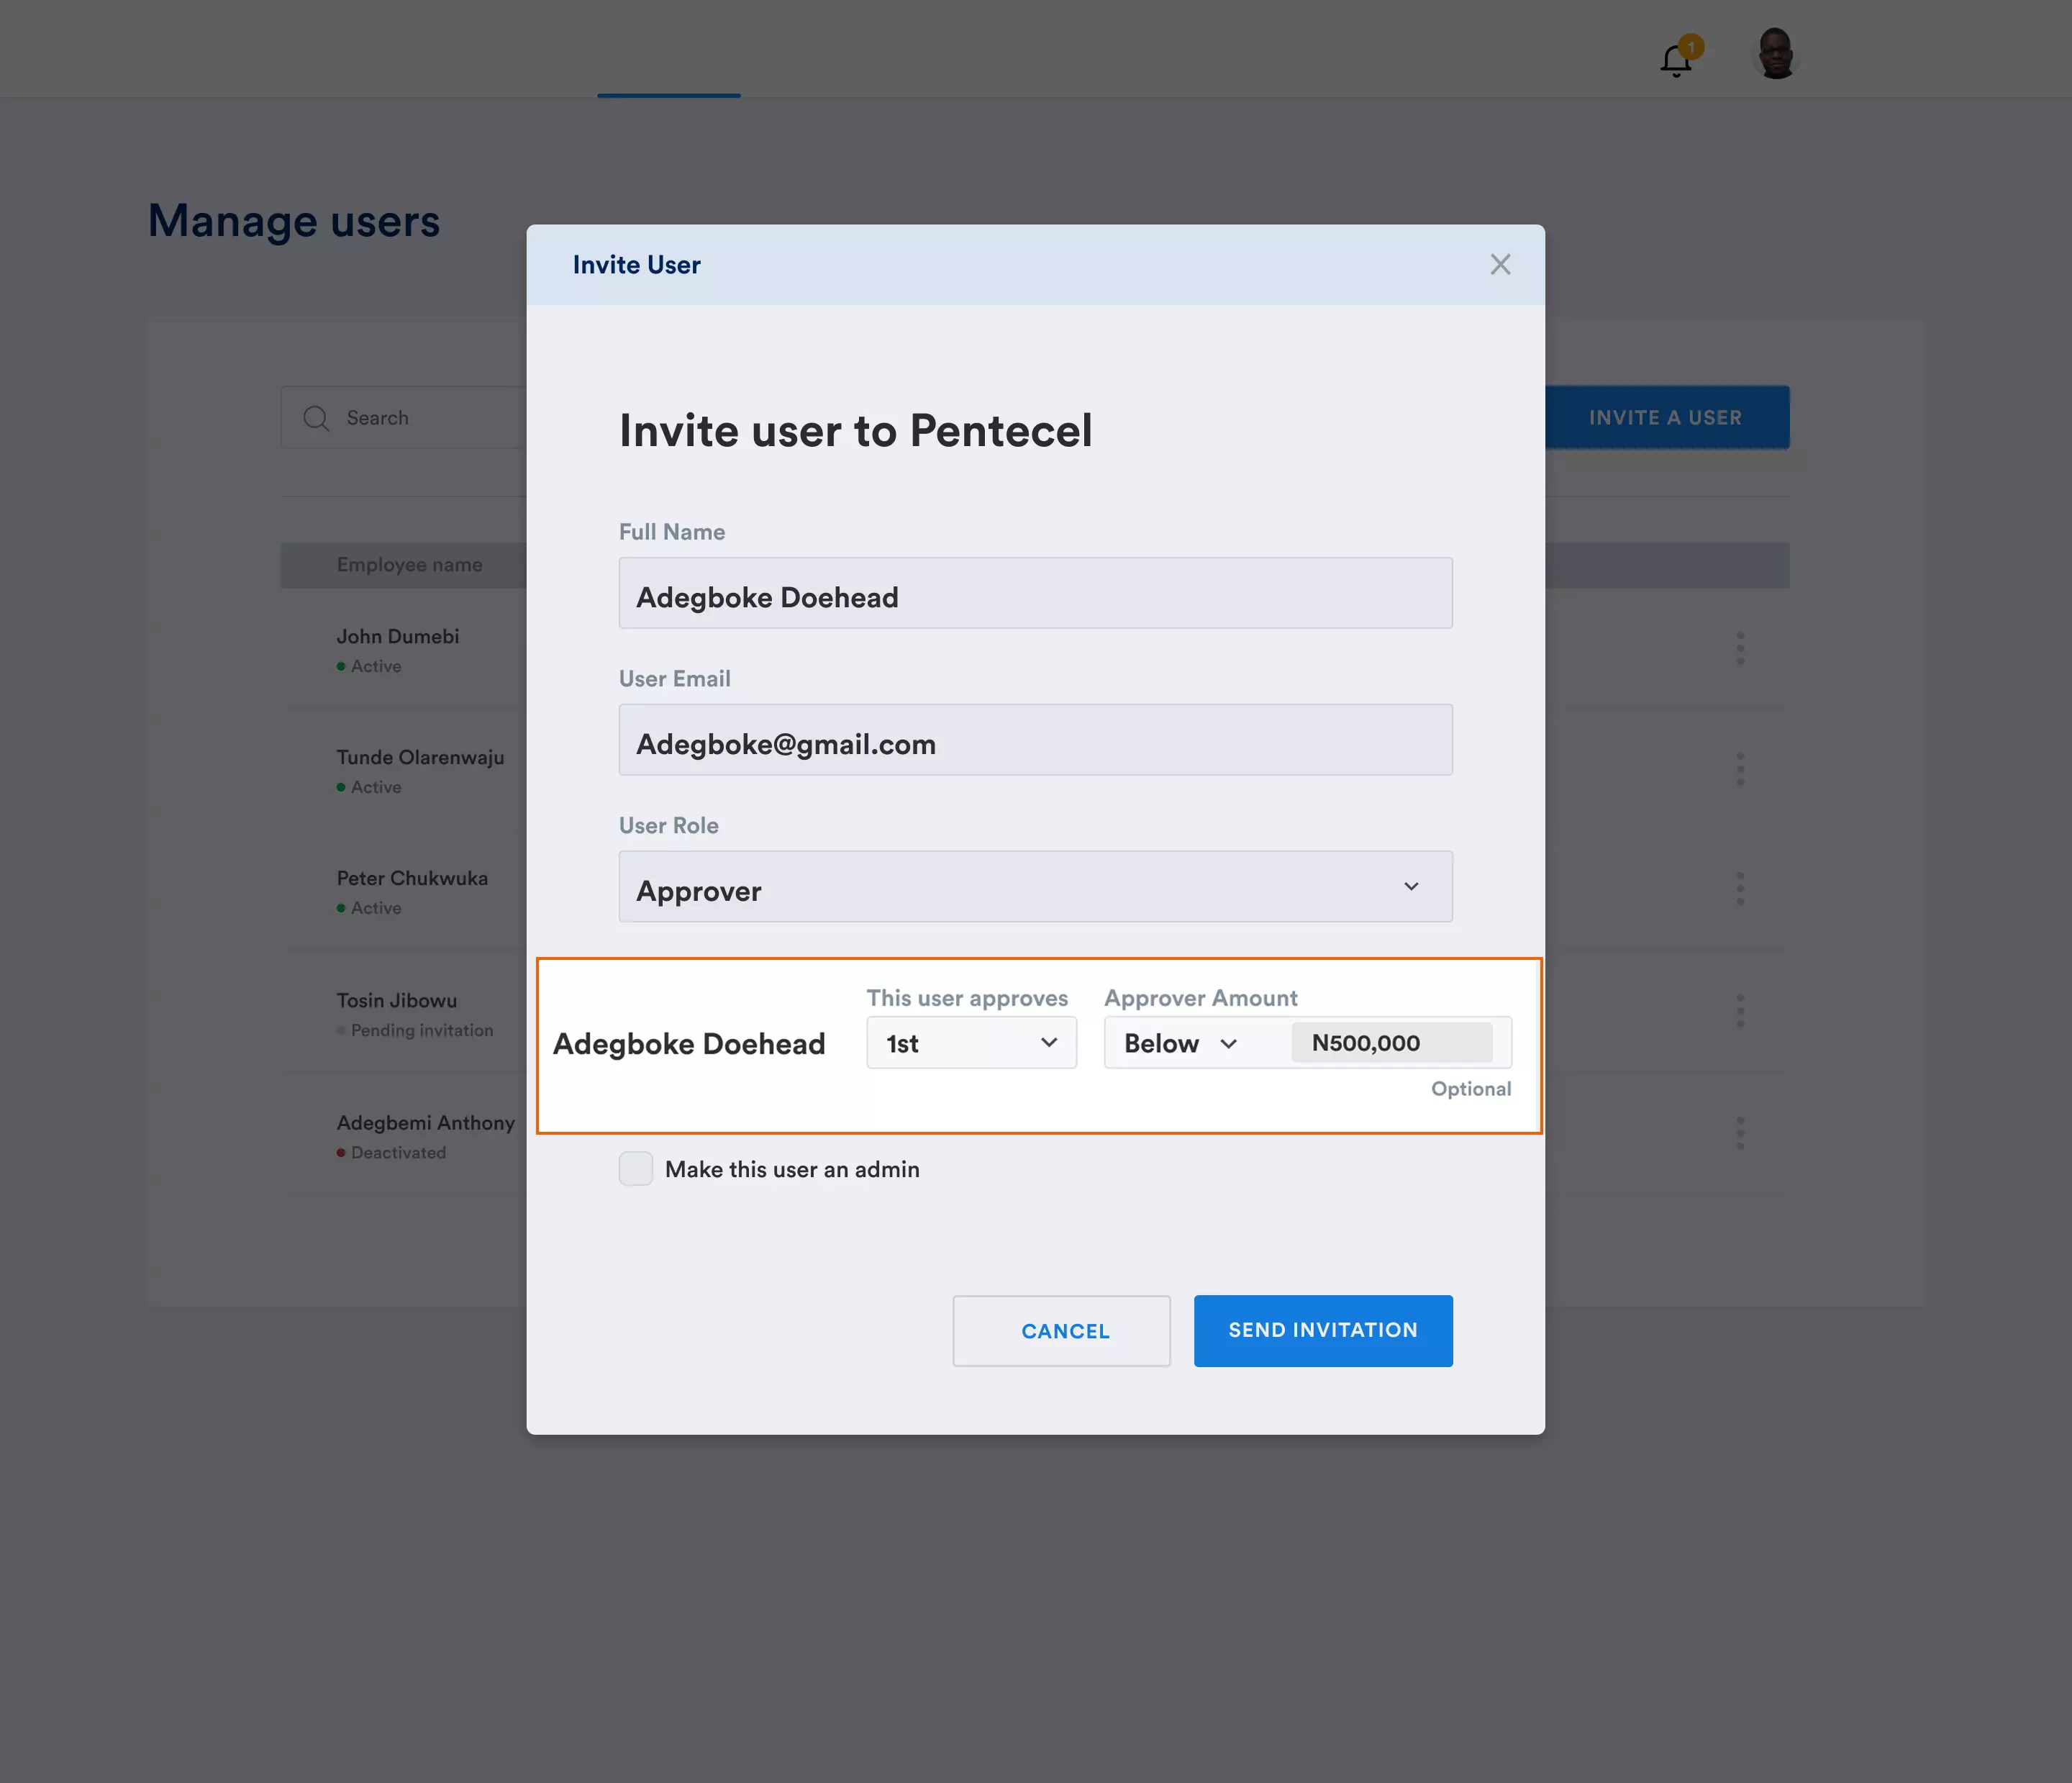
A. Approver: An Approver is a user in your organization who approves payments. You can have multiple Approvers and assign them different levels of authority. You can also set limits on the amount they can approve.
E.g., Adegoke of Pentecel was made the first approver in this organization, and the Admin set his approval limit to below 500k
B. Disburser: A Disburser is a user within your organization who authorizes the release of funds from the organization's Flex account. They fulfill the payments requested by a Requester and approved by an Approver.
C. Requester: A Requester is a user within your organization who initiates expense requests. Once a requester submits a request, it is then routed to Approvers and Disbursers for further processing and authorization.
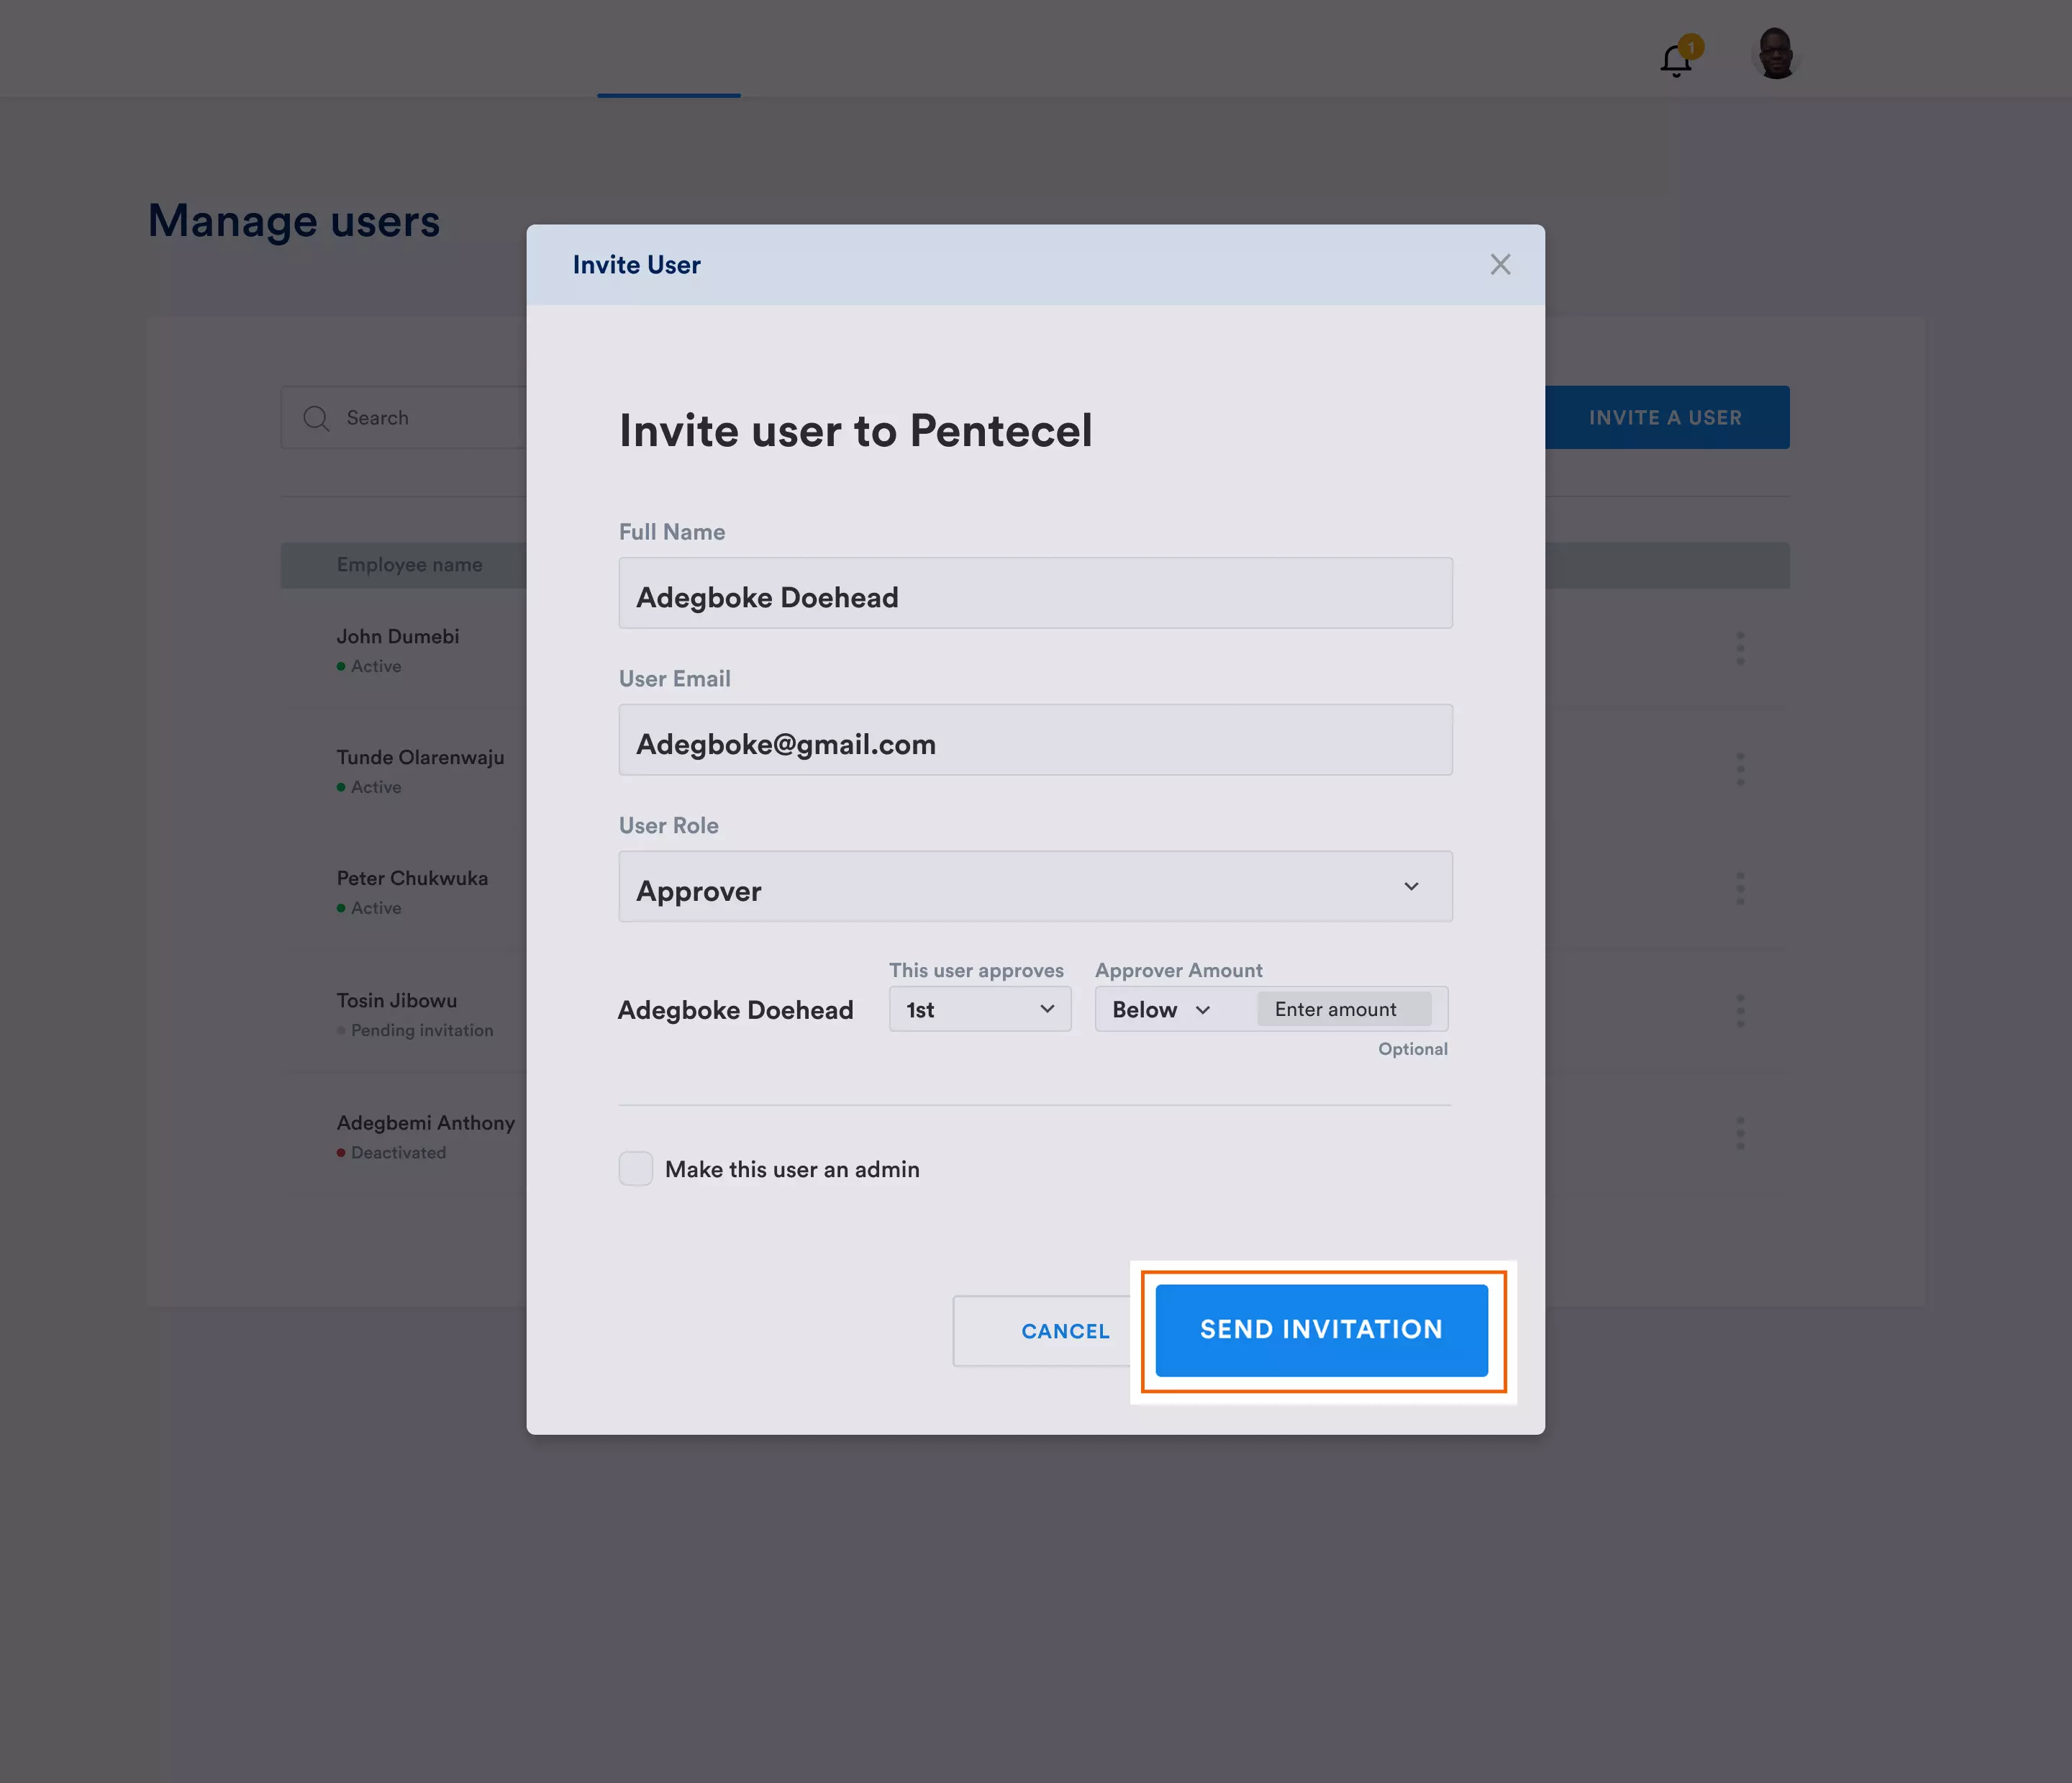
If necessary, you can also designate any user as an admin by checking the "Make User an Admin" checkbox.
Step 6: Confirm the details and click the "Send Invitation" button to invite the user. You will receive a confirmation notification indicating that the invitation has been sent successfully.
That's it!
With Flex, you can now easily manage approval workflows, set approval limits, and streamline your financial processes.